Arduino kits from Maker SHED arrived at my doorstep this week and today I finally had a chance to put it together. I bought a starter kit which comes with the main Arduino controller and a bunch of parts like buttons, LEDs, resisters, and bread boards. I ran through all the basic experiments in a day such as making LED’s blink, push button toggles, and performing IO over USB between the Arduino and computer. The Arduino software for creating programs is simple and really easy to use. In addition to the starter kit, I also purchased some shield kits which are basically expansion kits for the Arduino. I decided to build the LoL (Lot’s of LEDs) shield which mounts directly to the top of Arduino and provides visual feedback.
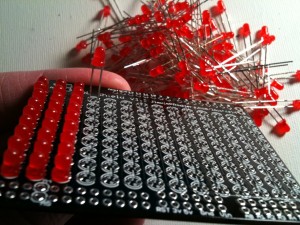
The LoL board has 126 LEDs arranged in a 14 x 9 rectangle. In order to put this thing together, I had to run out to Radio Shack today to buy a 40W solder iron, flush cutters, pliers, and of course solder. This shield requires soldering almost 300 connections!
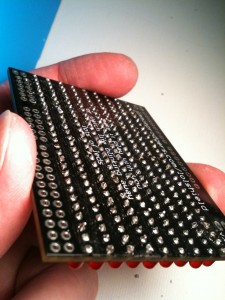
My soldering skills were a little weak at first, but after a couple rows it became much easier. It took me a couple hours, but I finally got every LED soldered and clipped. Look at the back of the board and all the drops of goo it required.
The connections are very close together so you really have to be careful. I constantly worried about holding the iron for too long against the board which might change some of the underlying logic or even worse make the board unusable. I also worried about shorting out pins from using too much solder. I don’t think I blinked much because I had to get up twice to get eye drops.
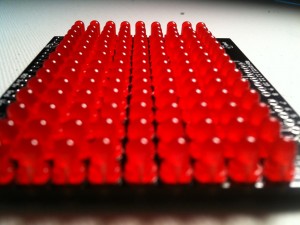
 There is nothing like finishing up that last row of LEDs. I did a final inspection to make sure everything looked in order. I touched up a few places, adding solder where needed, and clipping where there was too much. The crop of red LEDs were aligned evenly and looked great.
Now came the real test to see if it worked. I attached the shield to the top of the Arduino controller, plugged it into the USB port of my Mac, and then brought up the Arduino development environment. I went over to Google code and downloaded the LoL shield library. It took me a minute to figure out how to install the library but dropping it into your sketches folder under libraries/LoL did the trick. The compiler was now able to find the library and all the sample code compiled without error. I ran the basic test and was extremely relieved to see all the LEDs working.
I decided it was time to code something of my own. I started with the example code for Conway’s Game of Life and stripped it down to the bare essentials. I ended up creating a rain effect, where dots are placed randomly at the top, and then they fall down until they are off the screen. Here is a video of the final result:
Building and coding the Arduino Lol Shield has been a lot of fun. My next goal will be to create a game of some kind. I know others have created Pong and Space Invaders. I’d like to come up with something different. Any ideas?


Make a billiards game.
Looks wicked! Arduino FTW!
code? pls?
Code has been published. Link at bottom of article.
Cheers,
Todd
You call that rain! Why that is just a light drizzle.
Great job!
Very cool! You should consider entering this into the element14 Arduino contest- http://www.element-14.com/community/videos/1608
Pingback: Electronics-Lab.com Blog » Blog Archive » Making it Rain with Arduino!
You could make Arkenoid, or one player pong where you break the tiles. They like really straight-forward game names, like “Shoot Them Up”
so “Tile-Breaker” is appropriate….
or “Brick Breaker”
I’m going to play with the rain code to make it do some sensor stuff, but a ‘game’ where a user controls how fast the rain goes, or can further randomize the pattern with controls would be sick.
like super primitive, live, mario paint.
I’m into interactive art.
nice, thanks.
hi, i am trying to incorporate this code into a wall plaque/light I’m planning on making, and I’m going to use this shield (http://nootropicdesign.com/ez-expander/index.html) to expand the output pins with the library (http://nootropicdesign.com/ez-expander/downloads/EZExpander.zip) that comes with it. i was just wondering if you could foresee any problems i might have.
Hi,
I have a little problem with the examples of the folder “LoL”. Everytime that I try to verify a code, Arduino gives me an error that says “expected “,” or “…” before “&” token”. What I have to do?
Thanks!
Andrea from Italy
The patterns remind me of punched tape seen at Bletchley Park.
Using white LEDs it looks like snowfall. A novel Xmas decoration.
Thank you for sharing.